Monday, July 11, 2016

Math Journals in 5th Grade (and all grades!)

It's that time of year where we start to brainstorm ideas and resources we will apply in the upcoming school year and new adventures we want to take on! As for me, I know a MUST in ALL content areas is the use of journals. My experience working with ELLs has always led me to incorporate writing into all content areas and journals are an excellent way to do that.


I started looking at my teacher journal for the past 2 years and I have to honestly say how pleased I am with the work we do in our journals. The thinking, exploring, writing and collaborating we do through the use of journals is what I attribute to our STAAR success.


Are you looking to enhance or begin using math journals in your classroom? Here are a few suggestions I have.


First of all, composition books or spiral journals will work just fine for you. I've used both and both work well. I highly recommend setting up the journal on the 1st day of school so you and your kids are ready to learn immediately.

Here are a few tips for setting up the journal:
*Consider adding a rubber band to hold everything in place and to keep the journal from overflowing
*Add a pocket on the inside cover of the journal to keep some handy dandy tools and math related items
*use glue, rather than glue stick. Glue is simply more durable.


Once you set up the journal, give some thought to what you'd like to include in the journal. I find having some sort of structure, with flexibility of course, helps students stay organized and process content.

Here are a few components I always include in journals:
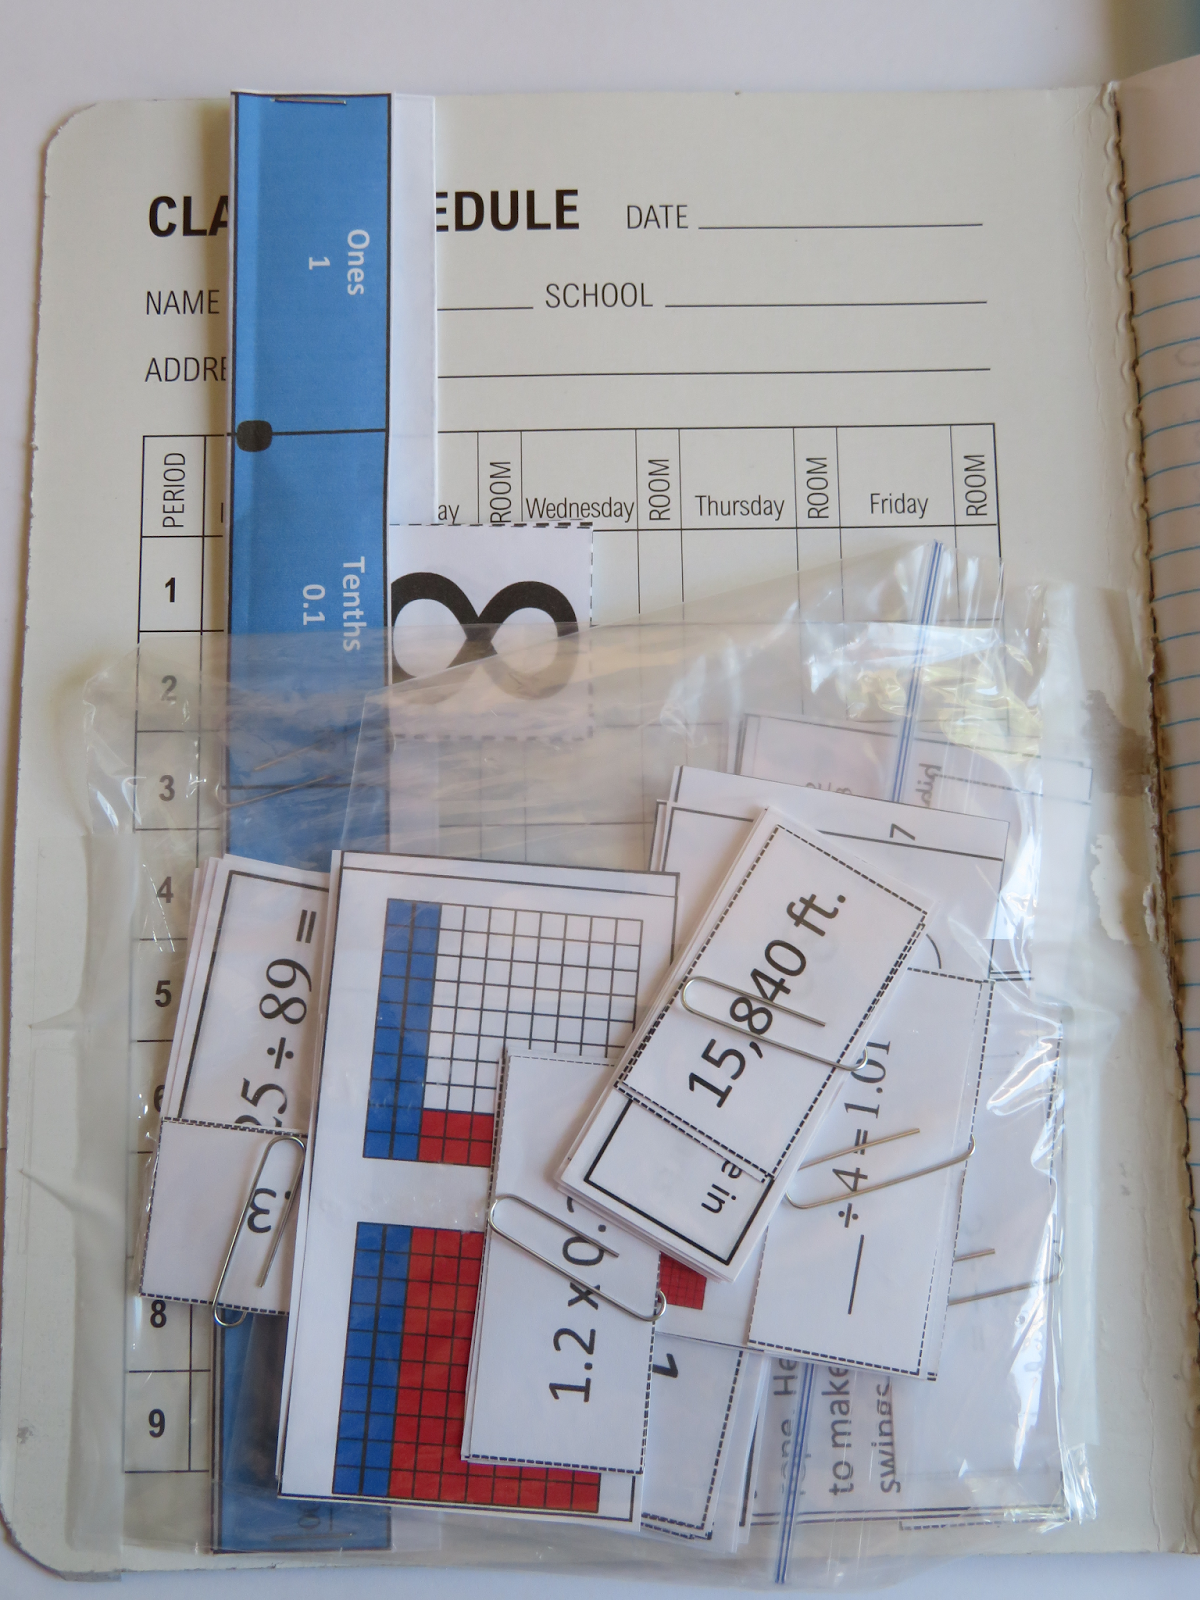
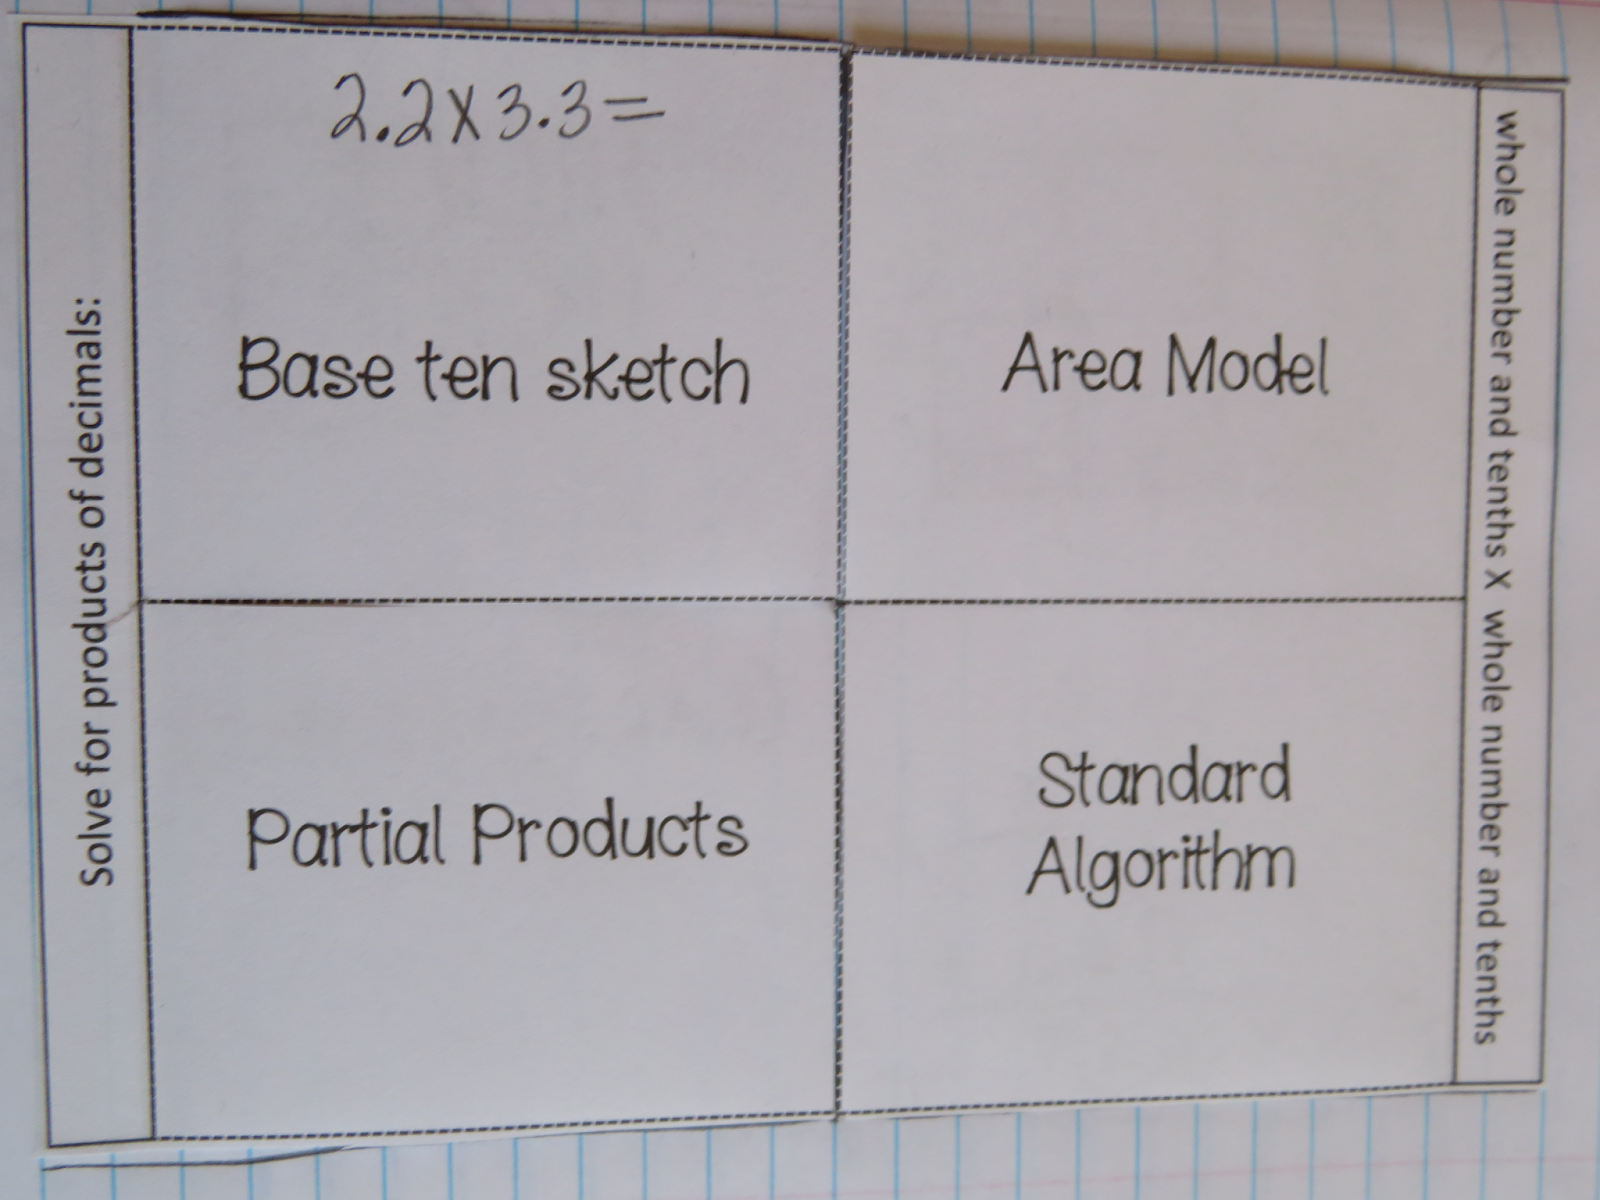
*Interactive graphic organizers (IGO). Kids love them. Teachers love them. They help chunk and organize information. I use different colors as we make them, that match a supporting anchor chart, so that it is easy for me to say "find your yellow IGO on dividing decimals." I use IGO for note taking and at times as a review. Here's a sample one for solving for products of decimals. Also, with IGO teacher your kids to see them as a resource they can go back to when they need a refresher or extra support during math.


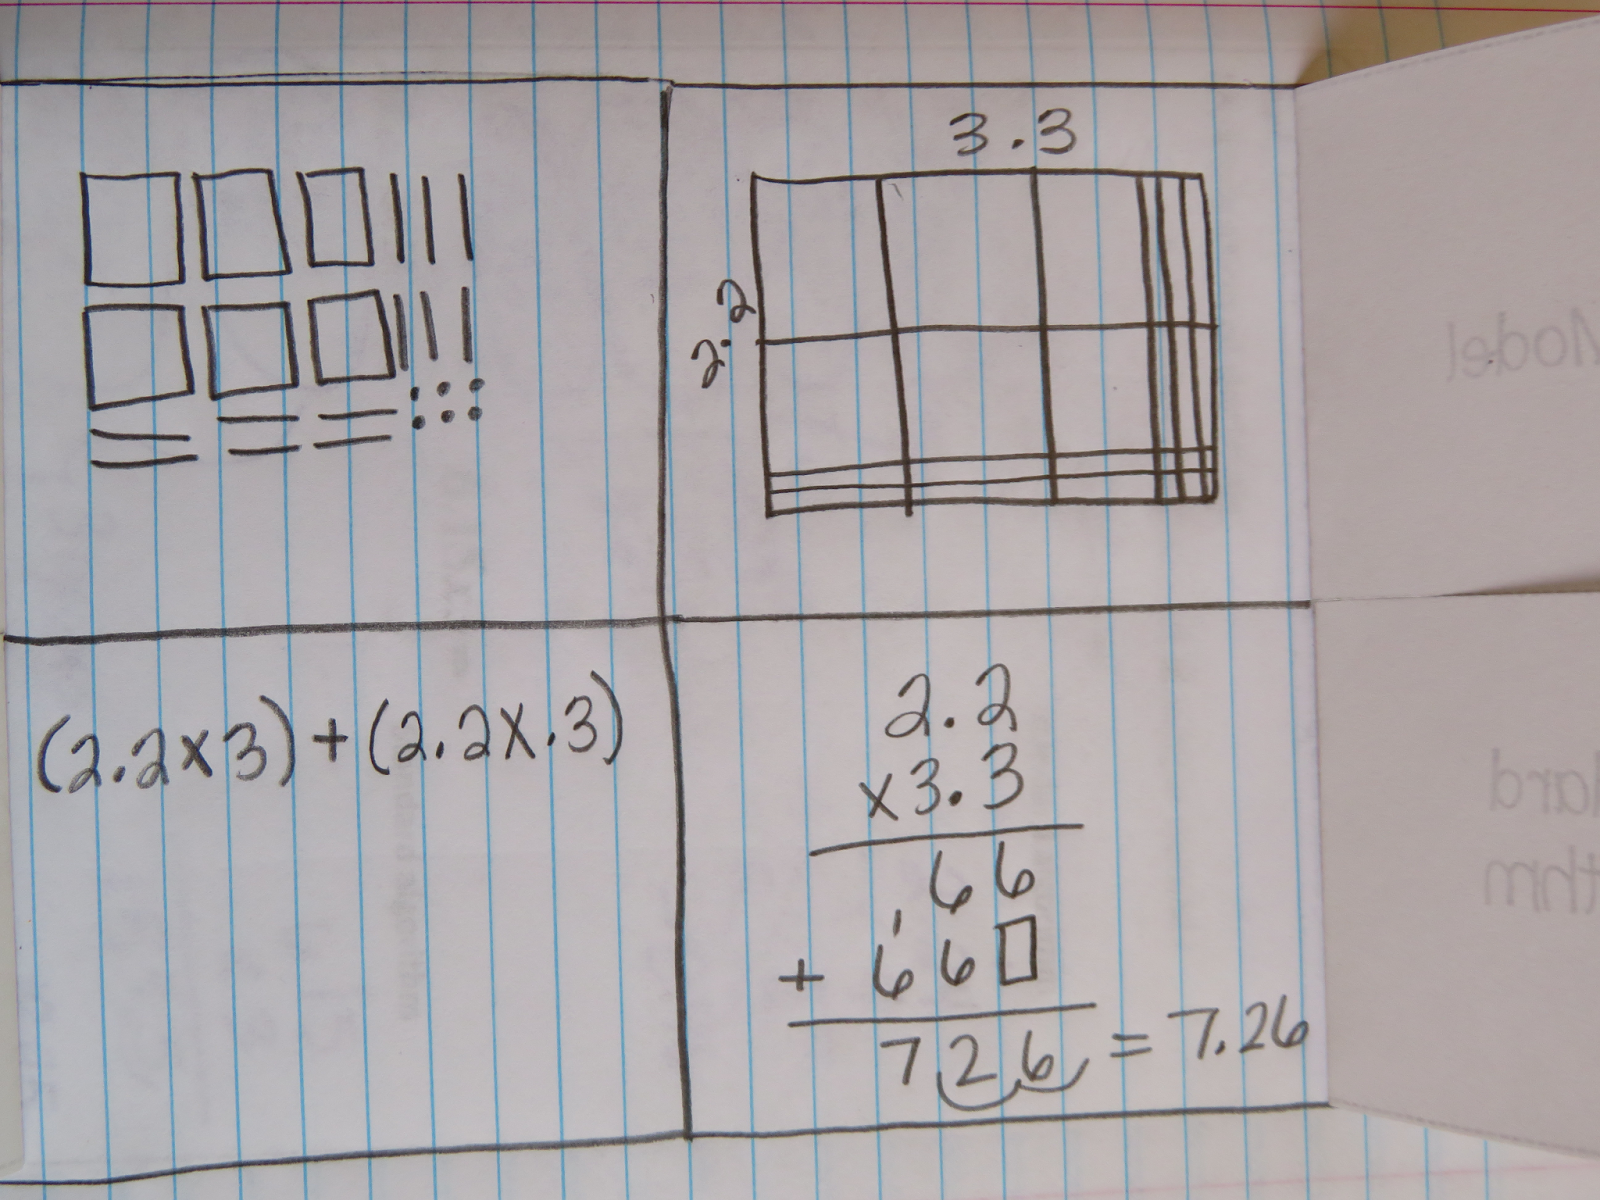
*Teach kids there are many ways to arrive at an answer! Here are some notes we took on different ways to add mixed numbers. Some kids will master all, some kids will master one way. It's OKAY! I usually tell them find the one you're VERY strong at, learn it backwards and forwards, and then I challenge them to learn one more way. It helps them to feel empowered that they can use what they know to connect and understand what they may be struggling with.


*Have kids write about math! That's right- writing should occur in all content areas! I've always seen writing as a way to solidify the learning and as a formative assessment tool. When kids write using content vocabulary, they make strong mathematical connections and deepen their understanding.


*Provide them with activities: Concrete to Pictorial to Abstract. I always tell my kids we are going to build it, sketch it, and solve it.

One example of this is a place value stand. We use these daily to practice skills such as rounding, expanded form and expanded notation. It's fun and doesn't take up a lot of our time. 


Here we used based ten blocks YES!!! in 5th grade :)  to compare decimals.


*Make real-world connections! In this activity we connected the multiplication of decimals and whole numbers to shopping at a grocery store! So much fun!


and last, but not least...


*Use a variety of graphic organizers (thinking maps) to process math learning. Whenever possible, have your kids practice both filling in and interpreting information found in tables and other graphic organizers. It's part of math! Have them share their findings and observations using sentence stems. You'll see their vocabulary expand!!!


So go on! Incorporate math journals into your daily instruction!!!


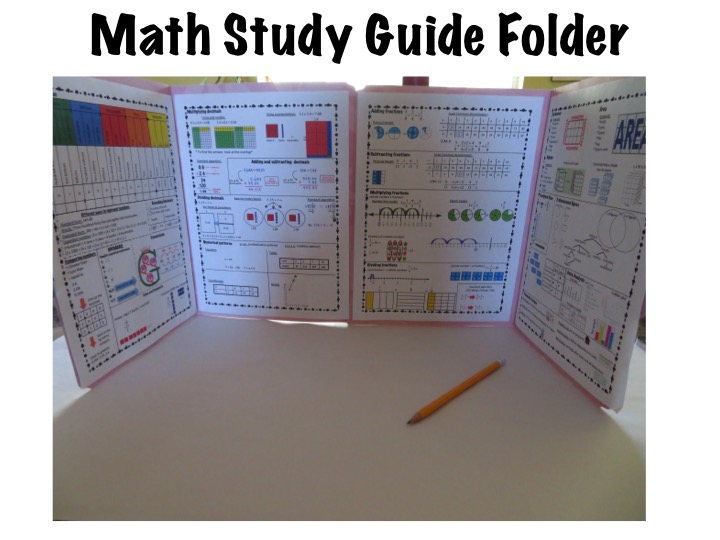
If you are interested in the activities and ideas for math journals, you may want to see my new math journal resource. A complete TEKS aligned guide with activities and examples for 5th grade math.


Have a wonderful day!


P.S. Are you a 5th grade teacher? Check out my TpT store! It is full of 5th grade aligned resources for math, science, and reading!


Wednesday, July 6, 2016

#Teachinghack No. 4: A pocket full of math

#Teachinghack No. 4: A pocket full of math


Everything has a place and everything is in its place. Simple, right? Not so simple in the everyday life of a teacher or student!


Here's a little hack to help with organizing an interactive journal. I've already shared how to keep an interactive journal from overflowing, and now here's a way to keep small cards, place value stands and any other math tools in a secure spot.


Use a sandwich bag and sturdy tape to make a handy dandy pocket. In my classroom, we keep all sorts of items in the pocket and if taped down correctly, it will last you all year long.


In the pocket we usually store a place value stand, a ruler, and any matching cards we use for math models.

Pretty soon our pocket starts to look a little like this


I always tell my students there is no down time in class. If they finish a task and are done with their center work, they can come to the pocket to find an activity to work on. The learning has to continue!


You don't have to worry about the journal becoming too thick, because you have rubber band to hold it all together.


Hope you found this #Teachinghack helpful.


Friday, July 1, 2016

Number representation for younger students

It wasn't until my new job required that I model lessons in the lower grades that I began to think about number representations, and also because I have a 4 year old at home who needs some school time built into his summer activities :) 


Last October I modeled a lesson in Kinder about different ways to represent numbers. The following was an extension the teacher and I prepped and built into a center for students to continue practicing.


We used large craft sticks to create these handy learning tools.


The pics above show that we were practicing recognizing a number, its written form, its value on a ten frame and in tallies. We colored the odd numbers red on the ten frame, and the even numbers green.

Later in the year, once the students were very familiar with the numbers, we asked them to sort them into even/odd.
P.S. Ask kids to sort things without giving them categories and see what amazing things they come up with. This particular kinder class sorted the sticks by curved and straight lines, shaded and unshaded shapes and number of letters.


BONUS! You can have kids create matching cards so that they can play a game! They'll need 5 cards per number: 1) number 2) words 3) ten frame 4) represented with objects and 5) tallies.


What other easy number representation activities have you tried?


Wednesday, June 29, 2016

#TeachingHack No. 3 Keeping your interactive journal from overflowing

Here's a hack for all the interactive journal lovers and stuffers out there. You know... the teachers who make tons of foldables, glue in handouts, notes, samples, interactive graphic organizers. Sound familiar? I know I'm guilty! By December our journals are stuffed with so much (and hopefully students' brains are too) that they barely fit in our magazine files!!!!


Here's a hack that you may find helpful.


You'll need: a journal, single hole puncher, large rubber band.


Ok..... so here's what you can do on the first day of school to ensure that your journals are ready to be stuffed with tons and tons of learning activities.


It really is that simple. Hole punch the upper right hand corner of the back cover, insert and loop a large rubber band and you're done!!


Hope you found this #Teachinghack helpful. :)


Wednesday, June 22, 2016

#TeachingHack No. 2 Math Study Guide Folder

I'm hard at work putting together some Math Study Guide Folders that my students can use this fall. We used them last year, but they were used to much that some need to be replaced. I will say that laminating them was a great idea because they really lasted well into the end of the year.


Ok... so here's how the Study Guide Folder works.


My students use these folders in a variety of ways. They use them when doing independent work, during centers and as a reference tool for assessments. Some parents have even asked me to make them a folder to take and have at home to refer back to. They really come in handy for many things, including as privacy folders during assessments. I have seen students refer to their study guide when they are unsure about some concepts and I've seen them grow more confident as they begin to master math concepts.

I have also used Science Study Guides during science time.


If you are interested, here's what you'll need:  


2 manilla folders, study sheets, and tape


I am already thinking of how I can create a language arts study guide.

Hope you find this #Teachinghack useful. 


Monday, June 20, 2016

Increase the rigor of student thinking using question stems

From many years of working with ELLs I have learned that one key ingredient in their success is exposing them to the language of assessments- those sentence structures that often stump them. I have had many students tell me they don't know what a question is asking them and once I reword the question they are able to answer it. Finally I had a light bulb moment and decided kids need practice having discussions and writing pieces while using rigorous language.

Description, sequence, cause and effect, comparisons, predictions and inferences- kids can do all these, but can they show what they know using content specific language and more complex sentence structure?

To meet the language needs of  students and to better prepare them with content knowledge, for the past year I have implemented the following question stems to increase the rigor in my teaching and in their thinking. Since my job now entitles modeling lessons K-6, I have seen these work in all grade levels.


I prep the sentence stems by having them cut, laminated, and held together using a small binder ring and I carry a set of 6-7 of them every time I go in and model a lesson in any grade level.

In all content areas, when I want students to show their thinking as they describe, sequence, cause and effect, compare, predict and infer I ask them to use one of the stems from the appropriate color. The kids get so used to using them that the skill eventually transfers to their writing! This is a nonnegotiable in the classroom- they HAVE to refer back to the stems so that they acquire practice and eventually fluency in complex sentence structures.

Below you will find an example of how I used the stems with  4/5 year old, PreK students during an activity for comparing 2 animals. (This is part of training I am providing for all teachers in my school who have ELLs so that we can learn some strategies to meet the increasingly demanding requirements of TELPAS).

We used a thinking map to show we are comparing animals. (These cool animal cards are from Target $1.00).

After adding some ideas, I wrote 2 sentence stems and we discussed what we could write using the graphic organizer. It is important to first start to compare orally, and once our ideas are cemented, we move on to showing what we know in writing.

Even at this age, students can demonstrate their thinking using more and more complex sentence structures.

I hope that you found this post helpful. I know that the use of stems has helped our ELLs tremendously, but they can be used with ALL students. It's about thinking, therefore it's about increasing the rigor in our teaching!


Wednesday, June 15, 2016

#TeachingHack No. 1

Teaching is such a difficult, but rewarding calling. I am fresh into summer vacation and I'm thinking of some new posts I want to make on a weekly basis.


The first series I will be starting is the #TeachingHack
I'll be posting a simple "hack" each week in hopes that it will be helpful to at least one person :)


This week's #TeachingHack is a folder I LOVE LOVE LOVE to make with my students. I saw my mentor teacher make it in her classroom and I have used it in my classroom every year since. Here's how you can make a simple 4-pocket folder.

*2 sheets of large construction paper and a stapler


 Steps: 
1. Fold the 1st sheet in half horizontally
2. Fold the 2nd sheet in half vertically. 
3. Fold the 2nd sheet in half horizontally. 
4. Tuck the 1st sheet inside the 2nd sheet. 
5. Staple the edges. Staple as close to the edge as possible so that you'll leave plenty of room for handouts.


I have used this folder for so many things, including: 
*STAAR Review (we assign each reporting category to a pocket)
*Homework folder, notes for home, unfinished work
*Tutoring and Saturday school
*Keeping track of handouts


Hope you find this #Teachinghack helpful. Stay tuned for more hacks that will be posted each week.